In this article we’ll discuss a variety of common methods for joining your laser cut and waterjet parts. Each of the topics we’ll cover here is an entire science all by itself, but we’ll cover the basics.
Topics in this article:
- Nuts and Bolts
- Threaded Inserts
- Rivets
- Adhesives
- Soldering/Brazing/Welding
Nuts and Bolts
The Basics
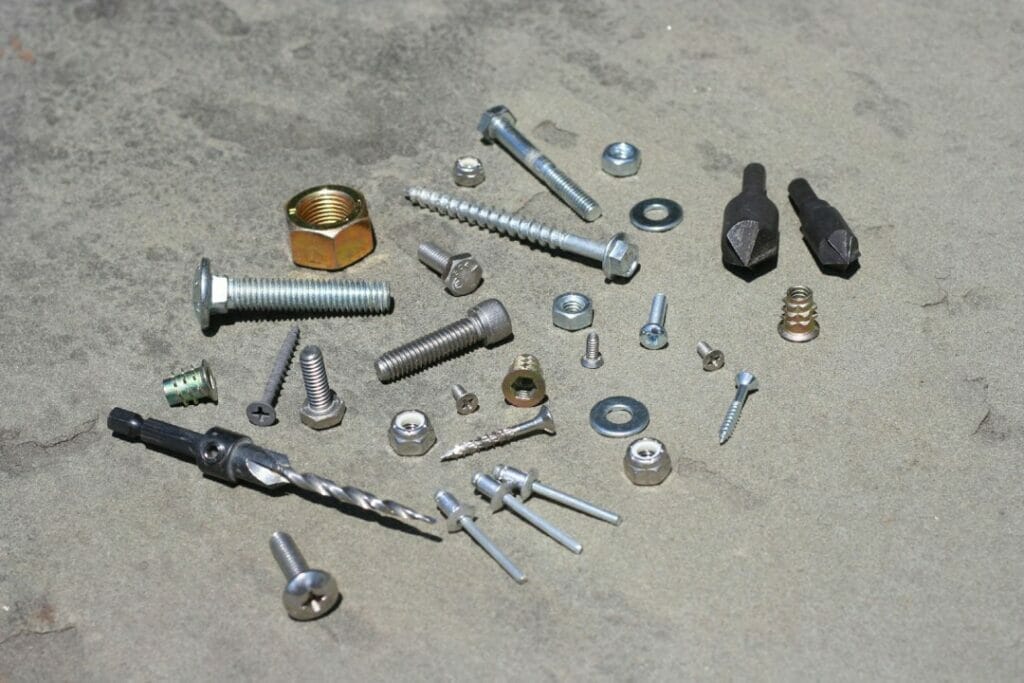
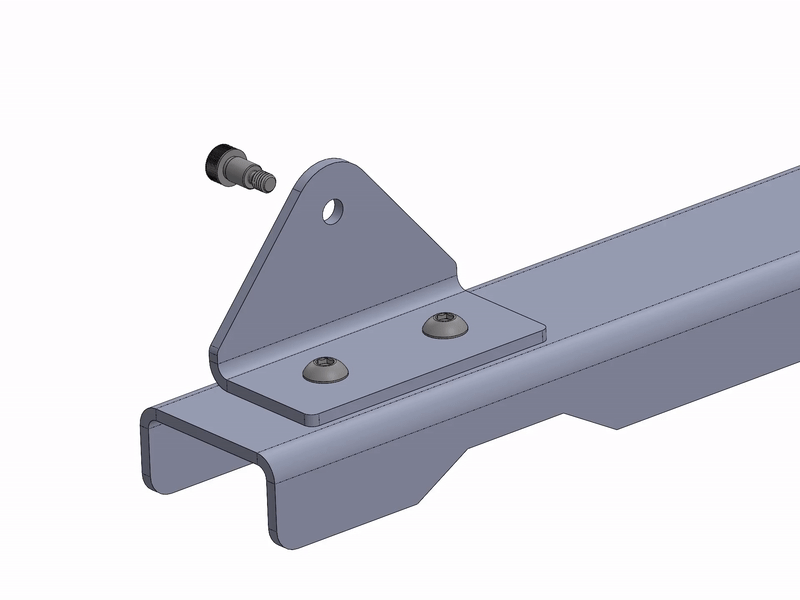
When most people hear the term “fasteners”, nuts and bolts are probably what they’re thinking. Bolting parts together is a commonly used technique for joining all types of parts. The basics of bolting parts together involves a hole through each part that a bolt or screw passes through. At one end is the head of the bolt/screw, at the opposite end is a nut, or a threaded hole directly in the part itself. As torque is applied to the bolt the parts are compressed together.
Typically when a separate nut is used as the female thread, the male threaded part is called a bolt. If the female threads are cut or formed directly into the material being clamped together, the male threaded part is called a screw. That said, it’s still common to see the terms bolt and screw used interchangeably.
Types
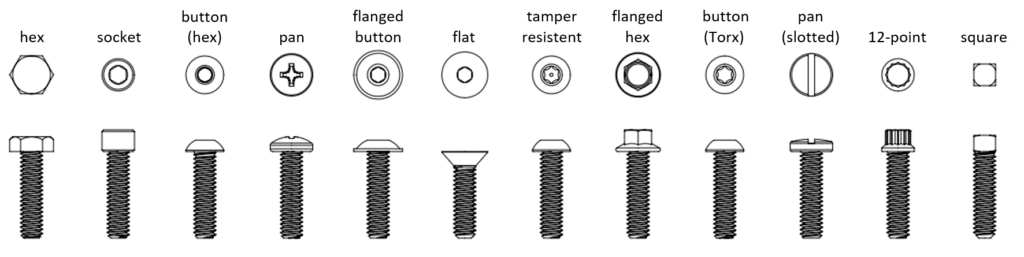
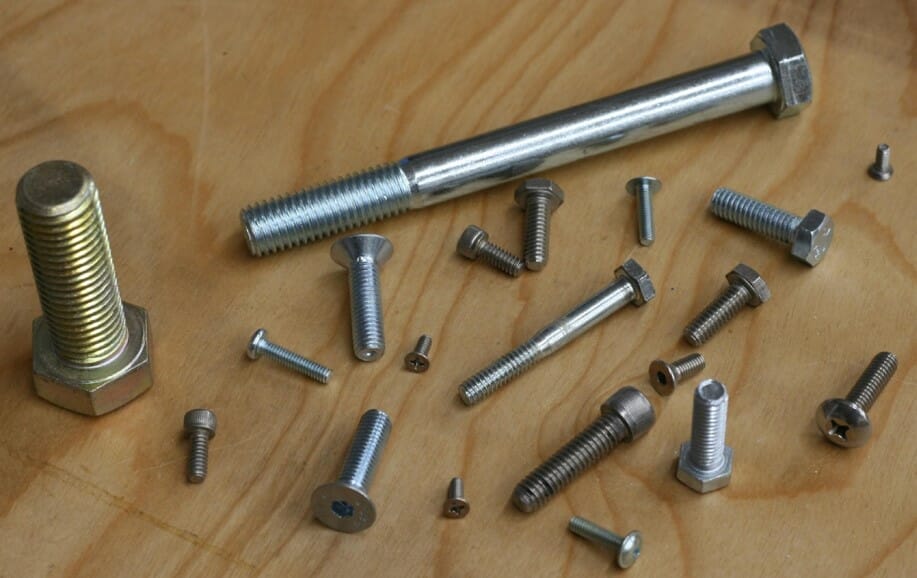
There’s no end to the number of styles, sizes, materials, etc. when it comes to bolts. We’ll break down some of the different types here. Let’s start with the head of the bolt. The head of the bolt typically determines what type of tool is required to tighten it. From wrenches/sockets, screwdrivers, hex keys, specialized security bits, or even no tool at all.
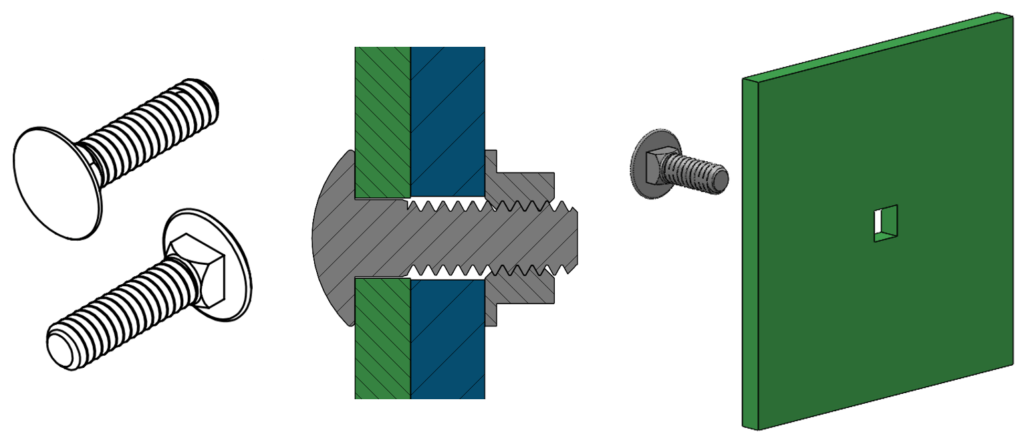
A carriage bolt has a unique head where there is a square shape under the domed head that can resist the tightening torque from the nut. By cutting the right sized square hole into your part, a carriage bolt can be used and leave a smoother appearance.
Where the style of the head of the bolt determines the tool you use to tighten it, the body of the bolt can be just as important to your application.
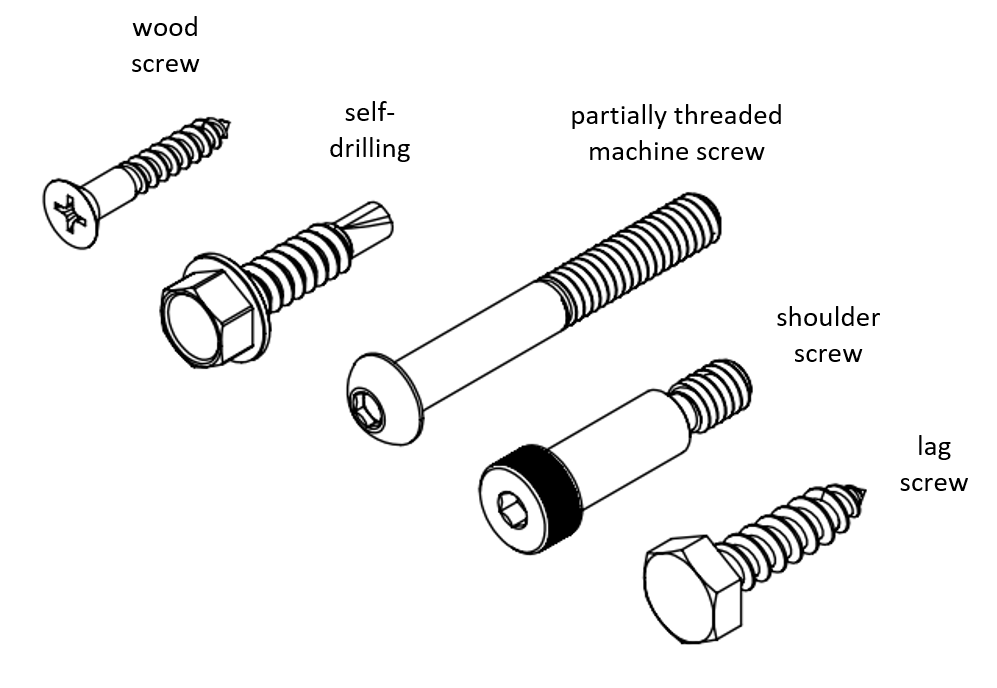
Some bolts have fully threaded bodies, others are only partially threaded. A shoulder bolt has an unthreaded portion with a shoulder at the base of the threads. This allows the nut to tighten up against the shoulder rather than your part which can be great for moving parts like wheels or linkages since the parts aren’t clamped together tightly, but the nut/bolt combination is.
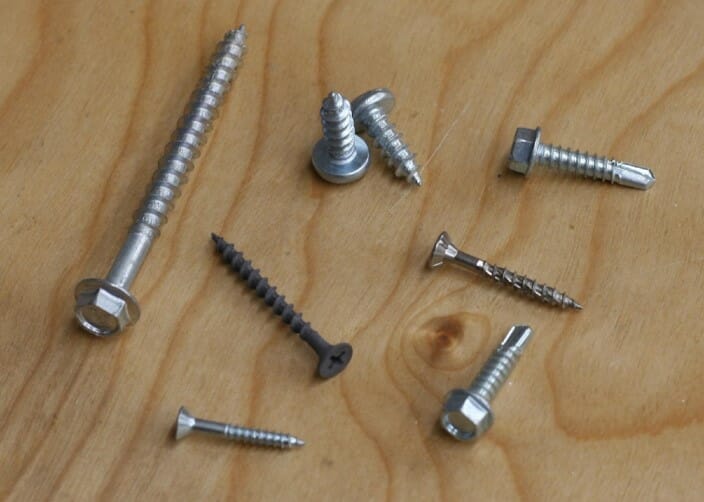
Some screws are designed to cut the female threads as they’re installed. These screws will generally (but not always) have bigger threads that are further apart. Wood screws and drywall screws fall into this category, both commonly used in woodworking. There are similar screws for sheet metal, which have a drill-like tip. These types of screws are typically not great for applications where you want to be able to disassemble and reassemble the parts multiple times. These screws are better suited to parts that are screwed together just once. They’re also not able to clamp parts together as tightly as other types because the self cut female threads are not as strong.
If you want to be able to disassemble your parts repeatedly, or need to clamp parts together tighter than a self tapping screw will provide, you’ll want to look at machine screws. Machine screws can be used in tapped holes or with nuts. When sized correctly, machine screws can be tightened much more than the self tapping type.
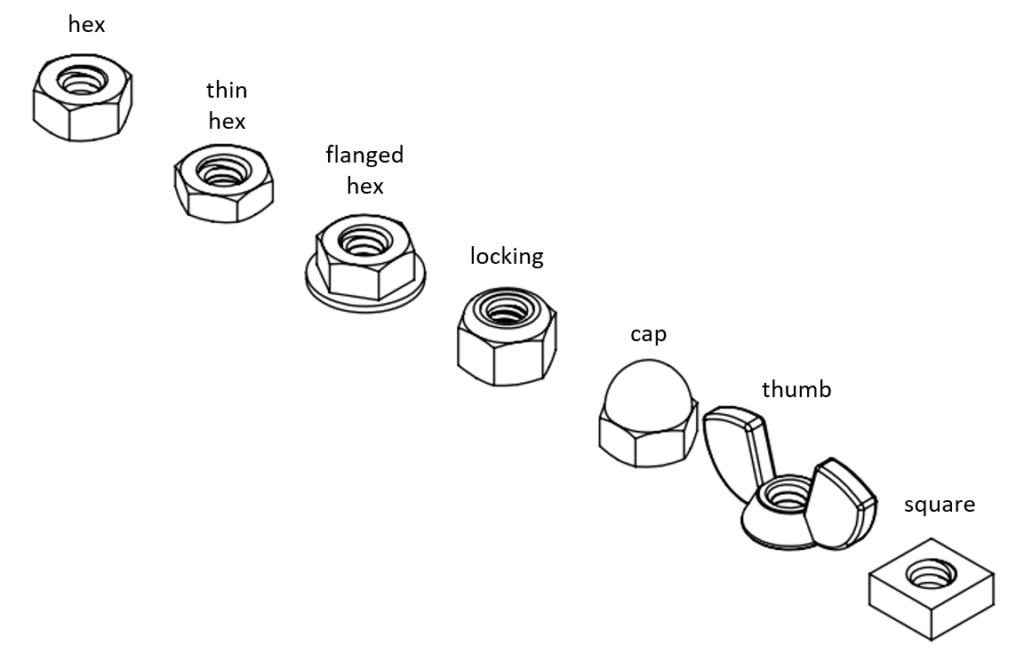
Nuts are available in nearly as many options as bolts. The most common shapes for nuts are hex nuts, but there are plenty of specialty nuts available. Something to consider when choosing a nut for your design is if you want one with a locking feature built in. Locking nuts are extremely common for assemblies that might see vibration or have some flex to them, as the threaded joints can vibrate loose over time. Using a nut with a locking feature helps to prevent that. Alternatively, you can use a thread locking compound (think Loctite or Permatex brands) with a non-locking nut to get the same anti-vibration benefits.
Nuts and bolts can be found in a range of different strengths. Inch sized fasteners can be rated by Grade (Grade 2, Grade 5, Grade 8…), and metric sized fasteners can be rated by Class (Class 8.8, Class 9.8, Class 10.9…). It’s also easy to find nuts and bolts that are ungraded. If you need to be sure of the strength of your bolt, use one that’s specifically rated for strength so you know what you’re getting.
Advantages
The advantages to using nuts and bolts to join your parts is that they are readily available and inexpensive. You can buy bolts at a local hardware store or online. Parts that get bolted together can be disassembled and reassembled easily. Parts can be bolted together before or after finish is applied, although removing a bolt that was installed before finish is definitely going to damage your finish.
Materials
Bolts are suitable to use with nearly all the materials we offer. The one exception is our Gasket Grade Cork, we wouldn’t recommend using a bolt to hold cork in place. If you’re using cork as a gasket, between firmer materials, then bolting them together can be a great option. The firmer outer materials can spread the load more evenly over the cork, preventing damage. Just take care when tightening the bolts not to over compress the cork gasket.
When it comes to threading the material directly, not only is that a service we offer, but if you check out the materials page you can see which materials are suitable for tapping. If you’d like to include tapped holes in your laser cut parts, head over to our Tapping Services page.
When using bolts on softer materials, or even on painted or powder coated surfaces, you might want to consider using a washer under the head of the bolt or under the nut. A washer can help spread the load from tightening the bolt over a wider area of the material. Washers can also help to reduce the chances of damaging finish when bolts/nuts are tightened.
Skills/tools required/part preparation
Depending on the type of bolt you choose, the tools required to bolt your parts together are minimal, likely a wrench (or two) or screwdriver. Obviously if you decide to use a specialty type of bolt, you’ll need the appropriate tool to tighten it.
Part preparation for using bolts to join your parts can be as simple as an appropriately sized hole. There are common sizes for various bolts you can use if you’re not sure what size hole to include in your part. If you plan to screw directly into your part, the hole will need to be tapped. If you plan to use smaller sized bolts/screws in thicker material, you’ll want to pay attention to the tolerances laser and waterjet cutting can achieve. You may need to use a slightly larger hole to be sure the fastener will fit.
Clearance Hole Chart (Inch) inches per ASME 18.2.8
| Screw Size | Close Fit | Normal Fit | Loose Fit |
| #0 | #51 | #48 | 3/32 |
| #1 | #46 | #43 | #37 |
| #2 | 3/32 | #38 | #32 |
| #3 | #36 | #32 | #30 |
| #4 | #31 | #30 | #27 |
| #5 | 9/64 | 5/32 | 11/64 |
| #6 | #23 | #18 | #13 |
| #8 | #15 | #9 | #3 |
| #10 | #5 | #2 | B |
| 1/4 | 17/64 | 9/32 | 19/64 |
| 5/16 | 21/64 | 11/32 | 23/64 |
| 3/8 | 25/64 | 13/32 | 27/64 |
| 7/16 | 29/64 | 15/32 | 31/64 |
| 1/2 | 17/32 | 9/16 | 39/64 |
| 5/8 | 21/32 | 11/16 | 47/64 |
| 3/4 | 25/32 | 13/16 | 29/32 |
| 7/8 | 29/32 | 15/16 | 1-1/32 |
| 1 | 1-1/32 | 1-3/32 | 1-5/32 |
Clearance Hole Chart (Metric) mm per ASME 18.2.8
| Screw Size | Close Fit | Normal Fit | Loose Fit |
| M1.6 | 1.7 | 1.8 | 2 |
| M2 | 2.2 | 2.4 | 2.6 |
| M2.5 | 2.7 | 2.9 | 3.1 |
| M3 | 3.2 | 3.4 | 3.6 |
| M4 | 4.3 | 4.5 | 4.8 |
| M5 | 5.3 | 5.5 | 5.8 |
| M6 | 6.4 | 6.6 | 7 |
| M8 | 8.4 | 9 | 10 |
| M10 | 10.5 | 11 | 12 |
| M12 | 13 | 13.5 | 14.5 |
| M14 | 15 | 15.5 | 16.5 |
| M16 | 17 | 17.5 | 18.5 |
| M20 | 21 | 22 | 24 |
| M24 | 25 | 26 | 28 |
| M30 | 31 | 33 | 35 |
Other Considerations
As we mentioned, bolts and screws are readily available from many different sources. You’ll want to pay attention to the quality of the bolt you’re buying. Some bolts are made to secure lightweight decorative parts together. Some bolts are specifically graded to have a minimum strength. If you need your bolts to be structural, be sure to choose them appropriately.
Bolts are made in all sorts of materials and finishes including steel, stainless, brass, even plastic. Some materials require special considerations. Stainless for example is great for corrosion resistance, but is typically not as strong as a steel bolt. Stainless also suffers from galling, which is when the friction between the male and female threads can actually cause the threads to “weld” together. The risk of galling can be reduced by lubricating the threads before installation. A light oil may work, but there are special materials called antiseize compounds that are designed for that purpose. Even with antiseize, take care when threading stainless male/female threads together. If you’re tightening a stainless bolt and it starts to get tight before the parts are together, it’s probably galling. Stop and remove it. If you try to push through, you’re likely to lock them together and it can require breaking/cutting the bolt to get them apart.
Depending on the environment where your parts will be used, you’ll want to select a suitable protective finish for any steel bolts to avoid rust. Parts kept indoors don’t need as much protection as parts outdoors that are exposed to the weather. Common finishes include zinc plating, galvanizing, black oxide, black phosphate. There are nearly unlimited options when it comes to finishes.
When designing your parts to use bolts/screws, you’ll want to pay attention to the amount of clamping force a bolt can apply. It’s possible to use bolts that are too small or too few bolts and have the joint come apart. On the other hand, it’s possible to over-tighten a bolt to the point of snapping the head right off or stripping the threads out. Stripping threads is especially problematic in thinner materials where there aren’t enough threads or in softer materials like aluminums, woods, plastics and composites.
When dealing with structural applications, bolt clamping force and how much to torque a specific bolt, there are formulas and charts you can look up to give you an idea of how much to torque a particular grade or material of bolt and how much clamping force you can expect. You can even find calculators online to help you decide what size and how many bolts your design needs.
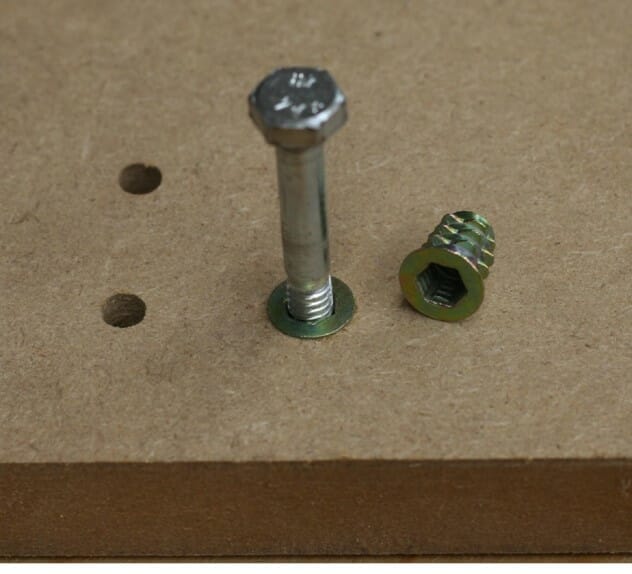
Threaded Inserts
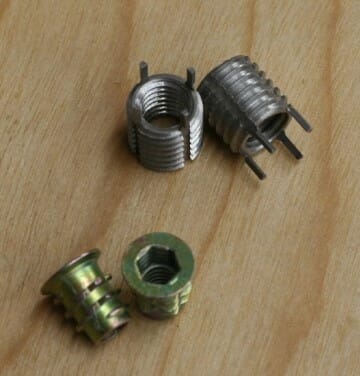
The Basics
Threaded inserts can be used along with bolts/screws as they are similar to nuts, but permanently installed in the material. They are commonly used in softer materials where threading the material directly might not be strong enough. Certain styles of threaded inserts can also be used to repair threaded holes that have been damaged.
Types
Threaded inserts come in a variety of styles. Some are designed to be used in metal and require a larger hole to be threaded into the material, then the insert is installed in that threaded hole. Some are designed to be used in wood or plastic and only require a pilot hole in the base material and the insert cuts its own threads as it’s installed.
Advantages
The main advantage to using a threaded insert is that they are typically more durable than the base material they are installed in. While some materials like aluminum and wood can be threaded, they may not be durable enough to hold up to repeated installing/uninstalling of a bolt/screw. MDF for example, is a relatively inexpensive material great for prototyping parts, but if you want to use a machine screw in an MDF part, the MDF isn’t going to be strong enough for the smaller threads. A threaded insert installed into the MDF will allow a machine screw to be threaded in and out multiple times with no damage to the threads.
Materials
Threaded inserts are more common for softer materials like woods and plastics, but inserts exist for use in steel and aluminum. It’s common for threads in aluminum to get damaged and there are inserts specifically designed to repair those threads.
Skills/tools required/part preparation
Some threaded inserts can be installed with nothing more than a drill and screwdriver or hex key. Inserts designed for steel and aluminum typically require special tools to install them.
Other Considerations
Threaded inserts are designed for specific materials, so when purchasing your inserts be sure to get the appropriate type. You’ll also want to pay attention to the size of the hole you’re installing the insert into. Too small and the insert could be difficult to install or even damage the material during installation. Too large and the insert may not be held tightly and could turn when a screw is tightened.
Similar to tapping a hole, an insert should be installed perpendicular to the surface. An insert installed at an angle will still take a screw, but the screw won’t be straight.
Rivets
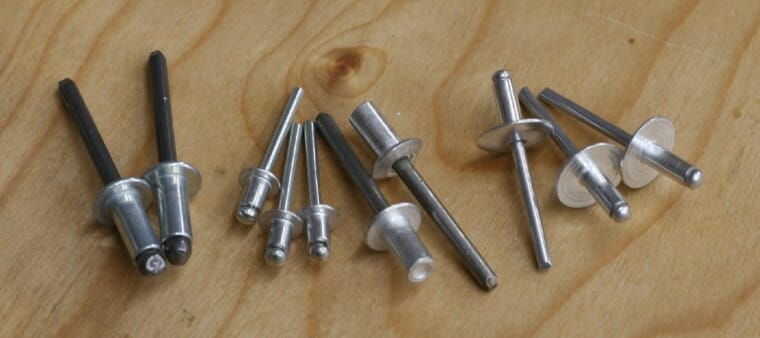
The Basics
Rivets are another common way to join parts, especially thinner materials. A rivet works by having its head on one end of the parts you’re joining and the body protruding from the opposite end. The body of the rivet is deformed towards the head clamping the parts together.
Types
Rivets are available in different materials including steel, aluminum, stainless, plastic, etc. There are multiple different types of rivets, we’ll discuss blind or pop rivets and solid rivets here.
A blind or pop rivet uses a special tool, either manual or automatic, to pull the center mandrel of the rivet through the head. As the mandrel is pulled it deforms the bottom of the rivet against the material. Once the bottom is deformed the mandrel breaks off leaving just the head of the rivet. The mandrel popping off during installation is what gives the pop rivet its name.
A solid rivet is actually simpler and has been around much longer. A solid rivet is simply a solid piece of material, commonly aluminum, brass or copper, with a head on one end and a straight body on the other. A solid rivet is installed through the parts to be clamped, and instead of a mandrel crushing the base of the rivet against the material, the base of the rivet is peened (deformed using a hammer) against the material, clamping the parts tightly against the head. The head of the rivet needs to be supported with an anvil, or some other solid surface during the peening. Blind rivets are much more common, but solid rivets can give your project a unique classic look.
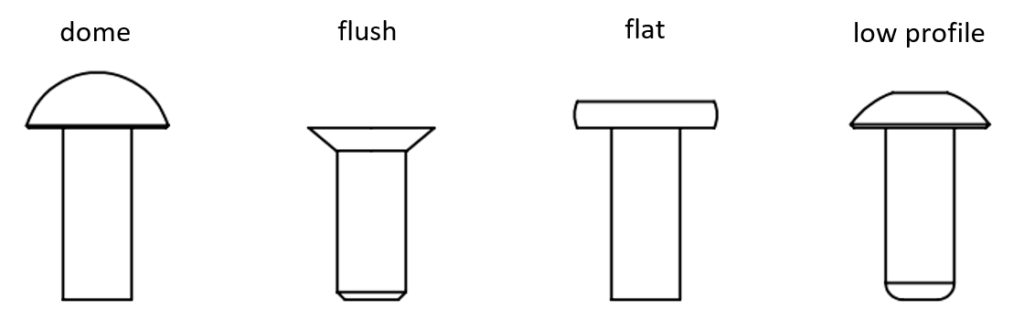
Similar to bolts, rivets are available with different head shapes. You can choose the head shape based on your project needs.
Advantages
The biggest advantage to rivets is their cost, rivets can be very inexpensive, including the tools used to install them. While a single rivet typically isn’t as strong as a single bolt, a large number of rivets can be installed relatively quickly. Using higher quantities of rivets can make your joints very strong. A lot of aircraft are assembled using thousands of rivets.
Materials
Rivets can be used on nearly all the materials we offer, again with the exception of cork (left out again!). Rivets can join different materials, such as carbon fiber to aluminum. It’s less common to use rivets in wood as the wood surface dents easily.
Skills/tools required/part preparation
There are no special skills required to rivet your parts together. Pop rivets will require a rivet tool, sometimes called a rivet gun, to install. A manual tool can be purchased for as little as $10 or a pneumatic rivet tool can cost hundreds of dollars. If you’re planning to install hundreds of rivets, you may want to invest in a better tool to make it easier.

Solid rivets require a little more skill to get just right, but can be installed with a pair of hammers. A pneumatic tool to help hammer down on the rivet makes it easier, but isn’t completely necessary.
Part preparation only requires an appropriate sized hole. Because rivets require a tighter sized hole than a bolt, rivets are a little less forgiving if holes aren’t aligned. Often parts are temporarily clamped together and a hole match drilled through both parts for the rivet to be installed. But with the accuracy of laser cut parts being within .005”, your parts should fit up excellent for rivets.
Other Considerations
As mentioned above, rivets require a relatively tight hole. Rivets also have a specific range for the thickness of parts being clamped together. When buying rivets for your project, be sure to choose the right diameter and length.
Adhesives
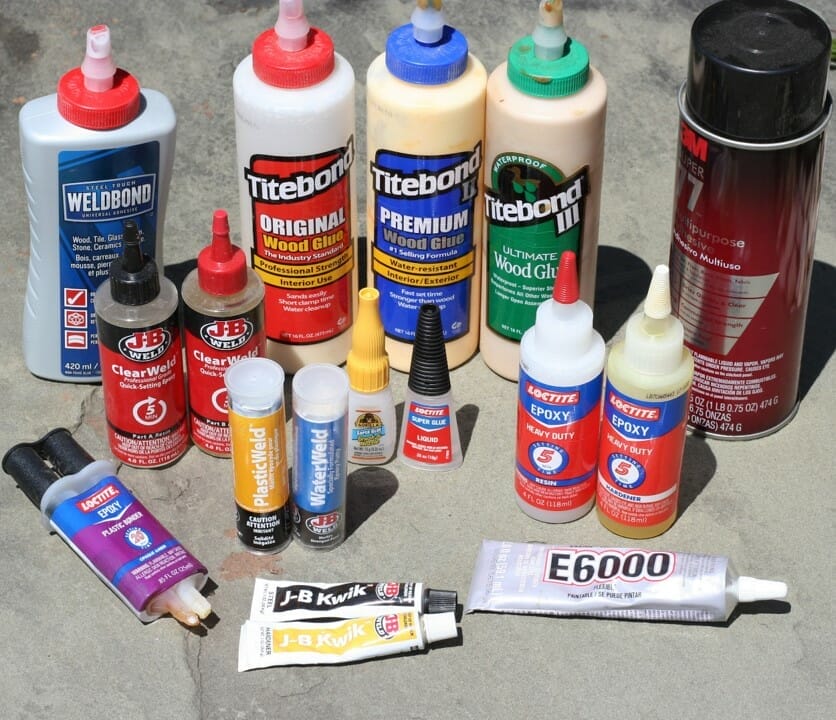
The Basics
The topic of adhesives covers a huge range of options. We’ll try to cover some of the most common along with some you may not be aware of.
Adhesives in this case are chemical compounds used between two parts to permanently (usually) join them together. Adhesives can be a great way to join materials too thin to be secured with typical fasteners.
Types
Adhesive types are most often dictated by the materials you’re bonding. For example, a quality wood glue used to join two pieces of plywood can be stronger than the plywood itself, but that same wood glue would be basically useless between two sheets of aluminum.
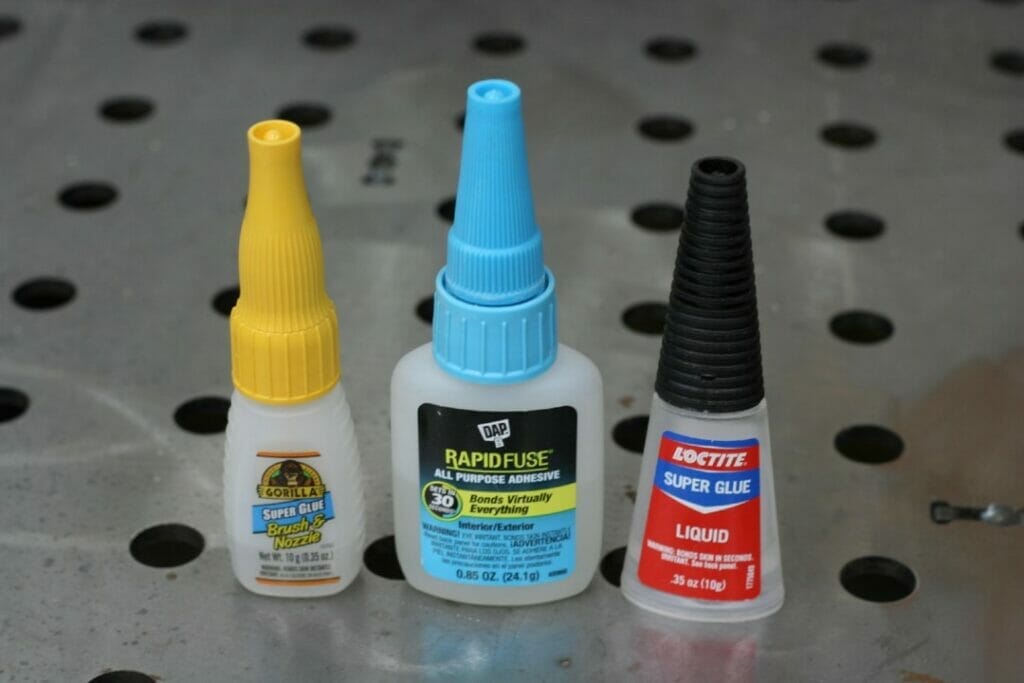
An adhesive like cyanoacrylate (commonly called super glue or CA glue) will generally hold any material to any other material (including your fingers!), but the bond likely won’t be good enough for anything structural, so it’s best to use CA glue for small, decorative or temporary jobs. CA glue is available in a range of viscosities from thin for getting into tight spots to thick gel that is less likely to run when you apply it.
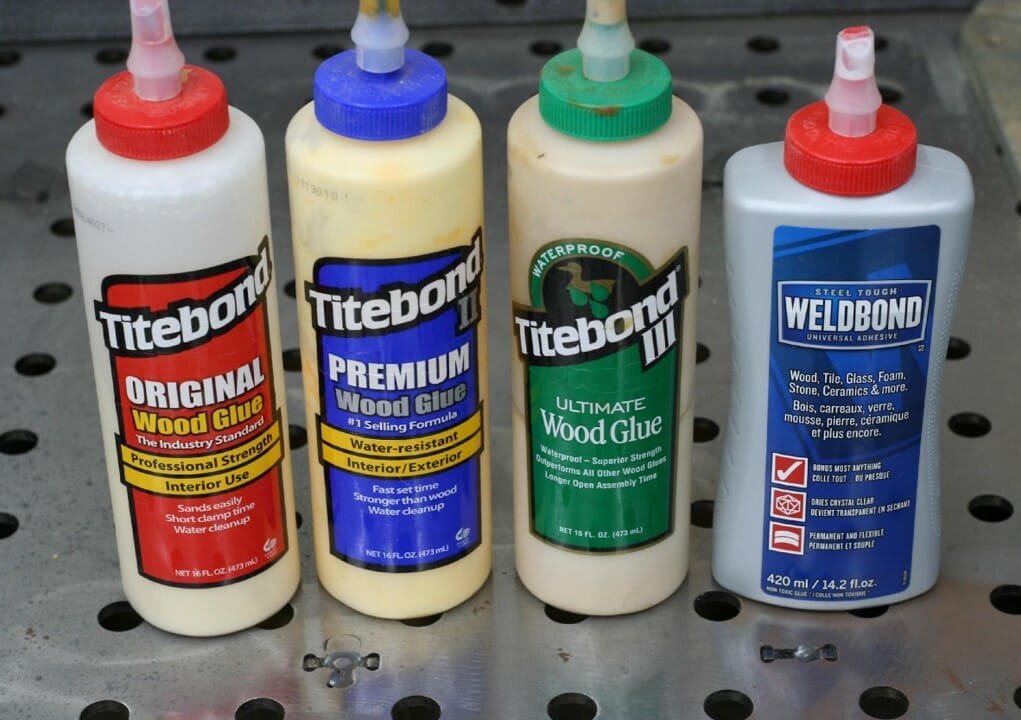
Wood glues do a fantastic job on both plywood and MDF, but those are the only materials you’d want to use them on. If you’re going to accidentally glue your fingers together, wood glue is a good choice as most wood glues cleans up with just water.
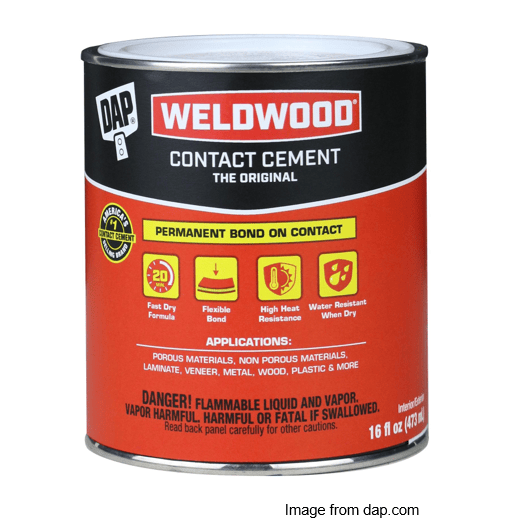
Contact cement is applied differently than most other adhesives. It is typically applied to both surfaces and allowed to dry for a period of time before sticking the parts together. We’ve been excluding cork until now, but contact cement is also an excellent choice for attaching cork to other materials. One of the few methods we’ll cover that can be used with cork.
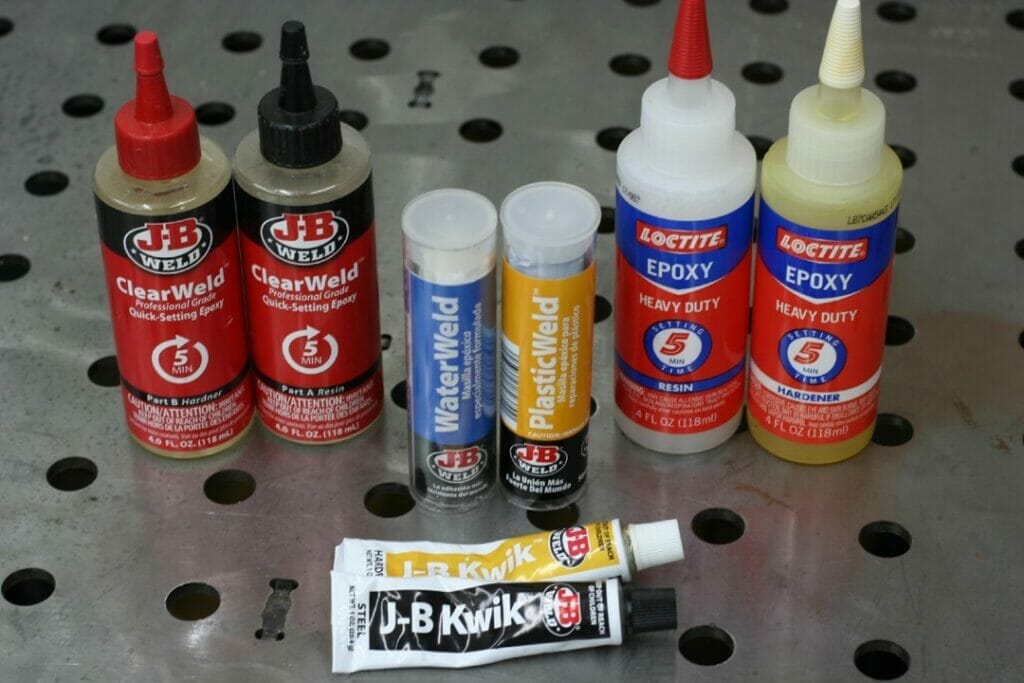
Epoxies are probably the worst smelling adhesive mentioned here, but they’re also the most versatile. Epoxy typically comes in two parts designed to be mixed together. While a lot of adhesives rely on exposure to air or moisture to cure, epoxies use a specific catalyst to start their curing reaction. Epoxies can be found in a huge range of styles and strengths. For example, 5 minute quick cure epoxies, great for securing knife handle scales, all the way to structural epoxies used to bond structural components in vehicle chassis. There are epoxies that cure underwater and epoxies that glow in the dark. Whatever your material or project, there’s almost certainly an epoxy out there that could handle it.
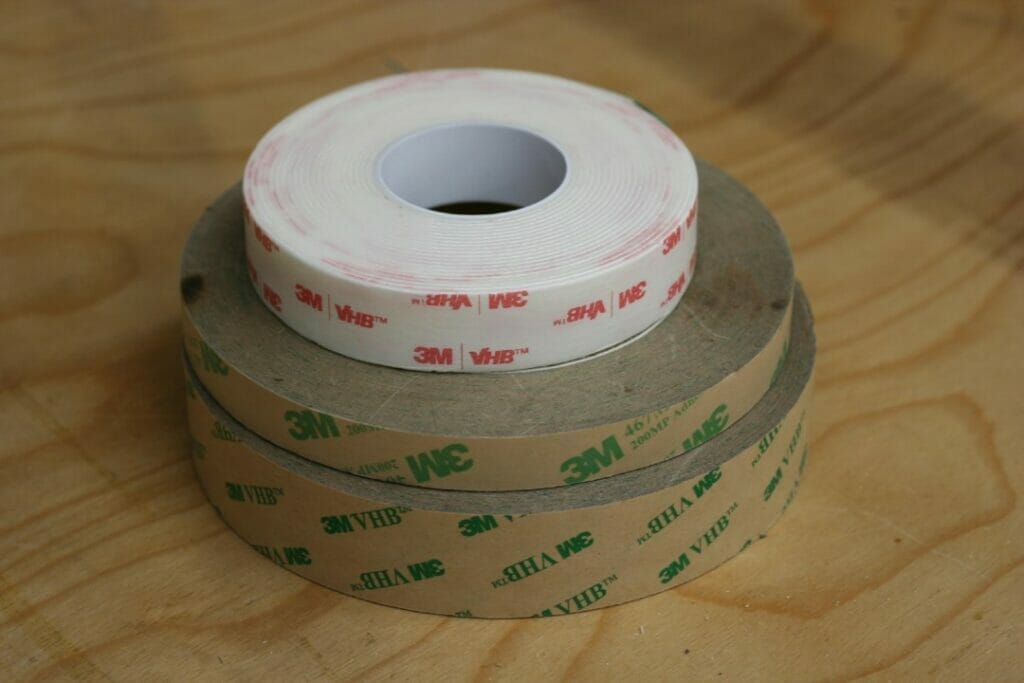
Tape. That’s right, tape. We’re not talking masking tape or even duct tape here. Those aren’t suitable to permanently attach your parts together. We’re talking the strong stuff, typically found with an acrylic adhesive on both sides. Double sided tape can be used to join just about every material we offer to any other material we offer (and that includes cork!). Some double sided tapes, like 3M’s VHB tapes are strong enough to permanently join light structural components. They can also be used to join delicate or decorative pieces. The trim and badges on a lot of production vehicles are held on using double sided tape.
And finally, specialty adhesives exist for several of the materials we offer. Acrylic for example can be welded together using acrylic cement. Delrin and UHMW are especially resistant to adhesives, but there are specialty adhesives designed to work with them.
Advantages
A big advantage for adhesives is that they can be used to secure thin or delicate parts. Very thin materials, even steel, aren’t going to be easy to secure with screws or rivets without damage. Sometimes you want to join your parts and have the final assembly look a certain way, and that doesn’t always include room for a bolt head. With adhesives you can attach parts together permanently without having fasteners in the way.
Adhesives can also be used as a temporary option to hold parts together for other operations such as match drilling holes or grinding/cutting the same profile into two separate parts. Glue your pieces together, make a single cut and when you split your pieces back apart they are a perfect match.
Materials
We discussed a lot of materials above. With adhesives, the options vary so widely that the materials you’re joining play a very important part in choosing the right adhesive. If you need to join different materials together, adhesives can be a great option. Follow the manufacturer’s instructions and you should get the results you expect. The good news is that there is likely an adhesive out there to join any of the materials we offer.
Skills/tools required/part preparation
There aren’t really any skills required to use adhesives other than figuring out how much to apply and getting an even layer when appropriate. Depending on the adhesive, you may need some extra equipment. Glues like cyanoacrylate and wood glue typically don’t require any special equipment, but you may want a roller to help evenly press down parts joined using contact cement. Some epoxies can be mixed together without any special equipment, some require very precise mixing ratios which might necessitate a special mixing gun or even a scale to measure out amounts.
Part preparation for adhesives will depend on the adhesive. Most will require a clean surface. Some will require the surface be roughed up a little so the adhesive has something to mechanically hold on to. With most adhesives, the more surface area you can adhere, the stronger the bond will be. So plan the shape of your parts accordingly.
Unlike bolts and rivets, adhesives may require some cleanup. Wood glues can typically be cleaned with water. Stronger adhesives might require a stronger solvent for clean up, like mineral spirits or acetone. CA glue isn’t the strongest adhesive, but it is stronger than skin, so if you end up gluing your fingers together you might want to have a debonding agent on hand (no pun intended!).

Some other special equipment we didn’t mention with bolts or rivets, personal protective equipment. Adhesives are chemicals, so you’ll probably want to protect yourself appropriately, whether that’s your eyes, hands, clothes, lungs, etc.
Other Considerations
Adhesives are available in a lot of variations. Pay close attention to the instructions for your particular adhesive. Adhesives can also be more susceptible to environmental factors like moisture and temperature than other types of fastening methods. We discussed equipment above, but keep in mind that adhesives are chemicals, so use them appropriately and take the necessary precautions.
Adhesives are basically a one shot method for fastening. Once the adhesive is applied, you’re not likely to get the chance to change your mind. You’ll want to have things ready before you apply the adhesive.
Soldering/Brazing/Welding

The Basics
It’s likely that you’ve heard the terms soldering, brazing and welding, but maybe aren’t sure what the differences are. The main difference between soldering and brazing is temperature, but otherwise the process is very similar. Soldering and brazing both involve melting a filler material between the two parts you want to join. When the filler material cools and re-solidifies the parts are joined together.
Welding is a similar process, with the difference being that welding involves melting both the filler material AND the base materials you’re joining. In some cases (fusion welding) welding can be done without a filler material, where just the base materials are locally melted together.
Types
Soldering is common for joining smaller parts together since it commonly uses a capillary action to draw the solder into the joint when heat is applied. Not to be confused with the soldering used in electrical connections or to joint copper plumbing fittings. Those processes are all soldering, but the actual fillers used are different. Silver solder is a specific type of solder containing, you guessed it, silver, designed to be stronger than other types of solder. Silver solder is very common in jewelry and for smaller parts, especially brass. There are also filler materials available designed specifically for joining aluminum or copper.
Brazing happens at a higher temperature than soldering, and so is usually a stronger joint. Again, a filler material is melted between two parts and once cooled the parts are joined by the solid filler. There is a larger selection of filler materials for brazing, each with different advantages and disadvantages.
Welding comes in at the top of the list for strength over soldering and brazing. While a filler material can still be involved, now the filler is specifically designed to mix into the molten base materials. Different fillers will be alloyed to work with specific metals or to provide specific properties.
Advantages
The advantages to soldering/brazing/welding are that they can form extremely strong, permanent joints. In some cases, a silver soldered joint may be able to be remelted and disassembled, but don’t count on that working well. In some cases welded joints can be ground or sanded flush leaving a nearly seamless joint.
Unlike adhesives, these processes don’t require as much surface area. In fact, the thin edges of parts are often brazed/welded together to form air/liquid tight connections. Unlike bolts and rivets, brazing/welding doesn’t require holes in the parts, although some designs do include holes through one part and use that hole to weld to the second part.
Materials
Due to the temperatures involved, soldering, brazing and welding are basically limited to metals. Silver solder is a great way to join brass and copper parts. Because soldering and brazing don’t involve melting the base materials, two different metals can be joined together easily. Braze aluminum to brass, steel to copper, etc.
Nearly all metals CAN be welded, but not necessarily all metals SHOULD be welded. Heat treated/tempered materials for example can be welded, but the temper will be affected. AR400/AR500 can be welded, but to get the best results special care should be taken. Highly alloyed metals like 4130 Chromoly can be welded, but again the right filler material and welding process should be used. Improper welding on certain materials can lead to cracking and joint failure as the joint cools.
Brass, copper, titanium, aluminum, stainless can all be welded, but may require slightly more specialized equipment like a TIG welder.
Because the base materials are melted and mixed together, welding different metals together can be more complicated. Certain types of steel and stainless steel can be welded together successfully with the correct filler. Steel and aluminum aren’t going to play nice together though.
Skills/tools required/part preparation
Of all the methods we’ve discussed so far, soldering/brazing/welding all require the highest level of skills and equipment. Soldering can be done with some silver solder or other appropriate filler and a propane torch. A torch that can get a little hotter may work even better. A traditional soldering iron for soldering electrical components probably won’t get hot enough for the type solder we’re discussing here. It’s also recommended to use flux to get the best results as it helps with cleaning and material flow.
Brazing can similarly be done with a torch and brazing filler material. Depending on the filler, a propane torch may be enough. Fillers like silicon-bronze will braze much better with additional heat from an oxy-acetylene torch or even a TIG welder.
Welding will require the most equipment by far. Welding can be done in multiple ways with all sorts of equipment, from oxy-acetylene kits, stick welders, MIG and TIG welders. If you want to weld aluminum, you may need even more, like a spool gun for your MIG welder, or a TIG welder that is capable of welding in AC (alternating current).

Because all of these processes involve extremely high heat, you’ll want to invest in the proper protective equipment. Having a fire extinguisher is a great idea, as well as adequate ventilation. Welding will generate bright enough light to both burn you (think super sunburn) and blind you, so you may want to cover exposed skin and you’ll definitely need a welding helmet to be able to see what you’re welding.
There is a small level of skill required to get good results with solder, where brazing will require slightly more skill and welding even more.
Before having your parts laser or waterjet cut, there isn’t any special preparation for these processes. You’ll want to plan ahead for where your joints will be, but otherwise parts can be butted together and joined. After you receive your parts you’ll want to make sure they are clean, with no scale or oxides. Some processes are less tolerant to dirty material.
Other Considerations
Because of the heat involved, special care should be taken with thinner materials as they can easily warp due to the heating/cooling cycles. Thicker materials can be easier to weld, but even thicker materials can warp during welding if you’re not careful.
In all three cases, a joint can look good on the surface but not be fully bonded. This can happen with dirty parts, gaps between parts that are too large, incorrect filler material/flux or insufficient heat.
Weld joints will shrink slightly as they cool, so take care to plan for that. Don’t be surprised if you clamp down parts with a perfectly sized gap before welding and after welding that gap is slightly smaller. There’s a little skill involved in planning for the weld shrinkage.
These processes will rigidly bond metals together, so pay particular attention to bonding different materials together. Aluminum for example will expand and contract more than steel due to changes in temperature. If they are rigidly bonded together and placed in the sun the aluminum will expand more than the steel, warping or even cracking could be a concern. Some filler materials are better suited to dealing with that.
Combinations of Methods
Now that we’ve discussed a handful of options for assembling your laser cut parts, let’s look at some examples of combining those methods.
Example 1
You may want the ability to bolt your parts together, but don’t have access to get a wrench to hold the nut on the back side of the part. If you can’t tap the base materials directly, another option is to weld a nut to the back side. The nut will be permanently held in place and you can tighten the bolt without needing access to hold the nut. Done correctly, the weld can be just as strong as the nut. Be careful not to apply too much heat to the nut using this method, the threads can be warped making it nearly impossible to install (or remove) your bolt.
Example 2
Similar to Example 1, adhesives can be used to bond threaded fasteners to non-metal (or metal if you want to avoid welding). A nut can be glued into a hole in a plastic or wood part. Threaded studs or bolts can be installed into tapped holes along with adhesive to make it more permanent or prevent it from backing out during use. While there are adhesives that can add a significant amount of resistance to twisting the fastener out, you should be careful when applying torque..
Example 3


The last example we’ll discuss is a combination of threaded insert and rivet, called a rivet nut or rivet stud. These work similar to pop rivets, the back of the rivet is deformed through a hole to grab onto the material. The difference is that in addition to the head of the rivet, there is a threaded hole or stud that can be used with machine screws/nuts. These are useful when you need a threaded hole, but the material is too thin to tap directly, or when you don’t have access to the back side to use a regular nut. Because there is a small lip on the top side of the material to clamp down, they do protrude slightly from the surface, so you’ll want to keep that in mind.


Conclusion
We’ve covered some of the more common methods for assembling your laser cut parts whether they’re decorative or structural (or both!). We’ve really only scratched the surface for the amount of information available on any of these methods, but hopefully you found something here you can use in your next project. When you’re ready, SendCutSend has the materials you need to get that project started.